How Image to Video AI Turns Static Photos into Moving Scenes
Why still images are gaining a new dimension
For years, a single photograph could capture a moment but not the seconds before or after it. Video added motion, but at the cost of time, equipment, and editing skill. Now a different approach is emerging: using an image to video ai model to generate realistic short clips from a single picture. The idea sounds like a magic trick, but the underlying technology is becoming practical enough for artists, marketers, and casual creators to use every day.
Instead of filming a scene, you feed a still image into a system that predicts how objects would move, how light would shift, and how the camera might track a subject. The result is a short video that feels like a natural extension of the original photo. This article explains how that process works, what to watch for in quality, and where the technology fits into a real workflow.
What image-to-video generation actually does
At its simplest, image-to-video generation takes one or more still images and produces a sequence of frames that form a short movie. The output usually lasts a few seconds, though some systems can extend the clip by continuing to predict motion. The core challenge is maintaining what researchers call temporal coherence: objects should not flicker, warp, or disappear between frames. A person's face should stay recognisable, a tree branch should sway naturally, and background elements should remain stable.
Early attempts at this task produced videos that looked like a sequence of unrelated stills. Modern models, however, learn from thousands of real videos how motion behaves in the physical world. They understand that a falling leaf does not teleport to a new position; it follows a smooth arc. That understanding lets them interpolate frames that feel continuous rather than jerky.
How the model builds motion from a single image
Most image to video ai systems work in stages. First, the model analyses the input image to identify key elements: foreground subjects, background textures, lighting direction, and depth cues. Then it generates a set of possible motion trajectories for each element. A car might drive forward, a person might turn their head, or a flower might sway in wind. The model chooses the most likely motion based on patterns learned during training.
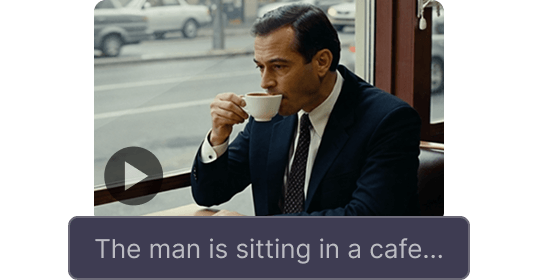
Next comes frame interpolation. Starting from the original image, the model creates intermediate frames that show the scene at slightly later moments. Each new frame is compared to the previous ones to ensure consistency. If a detail like a logo on a shirt changes shape between frames, the model corrects it before moving on. This loop of prediction and correction is what gives the final video a polished look.
Finally, the system adds cinematic audio. Not every tool does this, but the ones that do match sound effects to the predicted motion. A gentle breeze in the video gets a soft wind sound, while a door opening gets a creak. Audio helps sell the illusion of reality far more than visuals alone can.
Key factors that separate good results from bad
Not all image-to-video outputs look convincing. The difference often comes down to a few technical details that are worth understanding if you plan to use these tools.
- Motion consistency. The best models keep every part of the image moving in a way that feels physically plausible. If a person walks, their arms should swing in rhythm with their legs. If water ripples, the pattern should spread outward, not jump randomly.
- Subject preservation. Faces, logos, and text are especially hard to keep stable. A good model will hold the identity of a face across all frames without distortion. Poor models may change eye colour or reshape a jawline from frame to frame.
- Background stability. The background should not swim or warp while the subject moves. Some early tools had a habit of making the whole scene breathe as if it were alive, which broke the illusion.
When you evaluate an output, watch the clip several times. Look at the same spot across the whole duration. If a detail flickers or shifts for no reason, the model has a weakness in temporal coherence. Most tools improve over time, so checking recent samples from a service tells you more than reading old reviews.
Practical uses for generated video clips
Short AI-generated videos fit naturally into several creative workflows. Social media content is one obvious place. A single product photo can become a short looping clip that shows the item from slightly different angles, catching a viewer's eye as they scroll. Marketers use this to create video ads without hiring a film crew or renting a studio.
Artists and illustrators also find the technology useful. A digital painting can be brought to life with subtle motion: clouds drifting, hair lifting in the wind, or light shifting across a landscape. The artist retains full control over the original image, so the video becomes an extension of their vision rather than a replacement.
For personal projects, an old family photo can be turned into a short memory clip. The people in the picture might blink, smile, or turn their heads slightly, adding a sense of presence that a still image cannot convey. The emotional impact is often stronger than expected.

Trade-offs to keep in mind
Image-to-video generation is not yet at the point where every output is usable. The technology has limits that users should understand before planning a project around it.
First, control is limited. You cannot tell the model exactly how you want the scene to move. You might want a bird to fly left, but the model might decide it flies right. Some tools let you provide a text prompt or a motion brush to guide the result, but the level of precision is still far below what you get from traditional animation or filming.
Second, resolution and duration are constrained. Generating a high-resolution clip that lasts longer than a few seconds requires enormous computational resources. Most services cap clips at around ten seconds, and even then, the quality can drop if the scene is complex. For longer videos, you would need to stitch multiple clips together, which can introduce visible seams.
Third, the models are trained on general internet video, so they may struggle with niche subjects. A photo of a rare animal or an unusual object might produce unpredictable results. Testing with a small sample before committing to a final output is always a good idea.
How to get started without overcomplicating things
If you want to try image-to-video generation, the process is straightforward. Find a service that offers the feature, upload a clear, well-lit image, and let the system process it. Most platforms let you preview the result and adjust settings like motion intensity or clip length. Start with a simple image: a single subject on a plain background gives the model less to misinterpret.
Once you have a clip you like, you can download it and use it in your project. Some tools also let you provide a starting and ending frame, which gives the model a clearer idea of the motion arc. This technique, sometimes called keyframing, can improve consistency for longer clips.
Where the field is heading
The pace of improvement in image to video ai has been rapid. A few years ago, outputs were barely recognisable as video; today they can fool a casual viewer. Researchers are working on longer durations, finer control, and better handling of complex scenes. Some models already accept multiple input images to create a more complete view of the scene, which helps with motion consistency.

Another active area is real-time generation. Instead of waiting minutes for a clip to render, future tools might produce video in seconds, making the technology usable in live presentations or interactive installations. The same advances that drive video generation also benefit related fields like frame interpolation for slow-motion effects and video restoration for old footage.
Final thoughts on using this technology wisely
Image-to-video generation is a tool, not a replacement for filmmaking or animation. It works best when you have a strong still image and want to add a layer of motion without starting from scratch. The results can be impressive, but they require a critical eye and a willingness to iterate. As with any generative tool, the output is only as good as the input and the judgment of the person using it.
If you keep motion consistency, subject preservation, and background stability in mind when evaluating outputs, you will quickly learn which services match your needs. The technology is still young, and each new model brings improvements. The best way to stay current is to try the tools yourself and see what works for your specific images.